
Circuit Breaker Finder Not Working? 9 Causes and Fixes
Diagnose weak signals, multiple breaker alerts, silent receivers, and inaccurate scans without unsafe guessing.
Still Getting Unreliable Results?
Compare modern breaker finders with automatic calibration, clear visual indicators, and useful outlet-testing features.
Compare Breaker Finders on AmazonAs an Amazon Associate, we may earn from qualifying purchases. Price and availability may change.
A circuit breaker finder should make panel mapping faster, but it can feel less helpful than trial and error when the receiver beeps at several breakers or does not respond at all. Most problems are caused by setup, scanning technique, power conditions, or a limitation of the particular kit—not necessarily a defective tool.
This guide walks through a safe troubleshooting sequence for a typical plug-in transmitter and handheld panel receiver used on U.S. residential branch circuits. The exact controls differ by model, so keep the manufacturer’s instructions nearby. Do not connect a tool to exposed conductors or use accessories unless the manual explicitly supports that application.
Before Troubleshooting: Know What the Tool Can Prove
A standard breaker finder identifies the breaker most likely carrying the transmitter’s coded signal. It does not prove that every conductor in a box is de-energized, diagnose the electrical system, or replace a properly rated voltage tester. Multi-wire branch circuits, shared neutrals, subpanels, unusual wiring, power strips, and sensitive electronics can complicate results.
Fast Diagnostic Table
| Symptom | Likely Cause | First Check |
|---|---|---|
| Transmitter has no light | Dead outlet, tripped GFCI, poor contact, or failed transmitter | Test the receptacle with a known working device or outlet tester |
| Receiver is completely silent | Weak battery, wrong mode, power switch, or receiver fault | Install a fresh battery and run the self-test |
| Several breakers alert | First-pass sensitivity, signal coupling, or inconsistent scanning | Calibrate and repeat a slower second pass |
| Wrong breaker identified | Scanning direction, nearby signal, power strip, or circuit complexity | Plug directly into the outlet and rescan all breakers |
| Works on one outlet only | Other outlet lacks power, is switched, or sits behind GFCI protection | Confirm voltage at each target outlet |
| Intermittent response | Loose transmitter fit, weak battery, motion, or noisy load | Reseat both components and turn off nearby electronic loads |
9 Reasons Your Circuit Breaker Finder Is Not Working
1. The Outlet Is Not Energized
Most plug-in transmitters need an energized receptacle to send their coded signal. If a breaker has already tripped, a wall switch controls the outlet, or an upstream GFCI device has opened, the transmitter may remain dark or produce no detectable signal.
Plug in a known working lamp or use a properly rated receptacle tester. Check both halves of a duplex outlet because one half may be switched. Reset the relevant GFCI only after making sure it is safe to do so. If the outlet remains dead and the reason is not obvious, stop and have the circuit inspected rather than opening boxes at random.
2. The Transmitter Is Not Fully Seated
Paint, worn contacts, child-safety shutters, loose receptacle tension, or a bulky faceplate can prevent full insertion. The transmitter may appear connected while one blade is making poor contact. Unplug it, inspect the blades for damage, and firmly reinsert it into a sound receptacle.
Avoid using an extension cord, surge protector, UPS, smart plug, or power strip during the first test. These devices can attenuate, filter, or redirect the coded signal. Connect directly to the wall outlet whenever possible. Never force damaged equipment into a receptacle.
3. The Receiver Battery Is Weak
A receiver can power on yet perform poorly when its battery voltage is low. Weak batteries may cause intermittent beeps, limited detection distance, dim indicators, or inconsistent calibration. This is especially common when a tool has remained in a hot garage for months.
Install the correct fresh battery, observe polarity, and clean only accessible battery contacts according to the manual. Do not mix old and new cells. Run the receiver’s self-test if available. Remove batteries before long-term storage if the manufacturer recommends it.
4. Calibration Was Skipped or Done Incorrectly
Many receivers learn the panel’s background signal during a complete first pass. If you start guessing after the first beep, an adjacent breaker can look like the target. Some models calibrate automatically; others require a button, a starting distance, or a particular scan procedure.
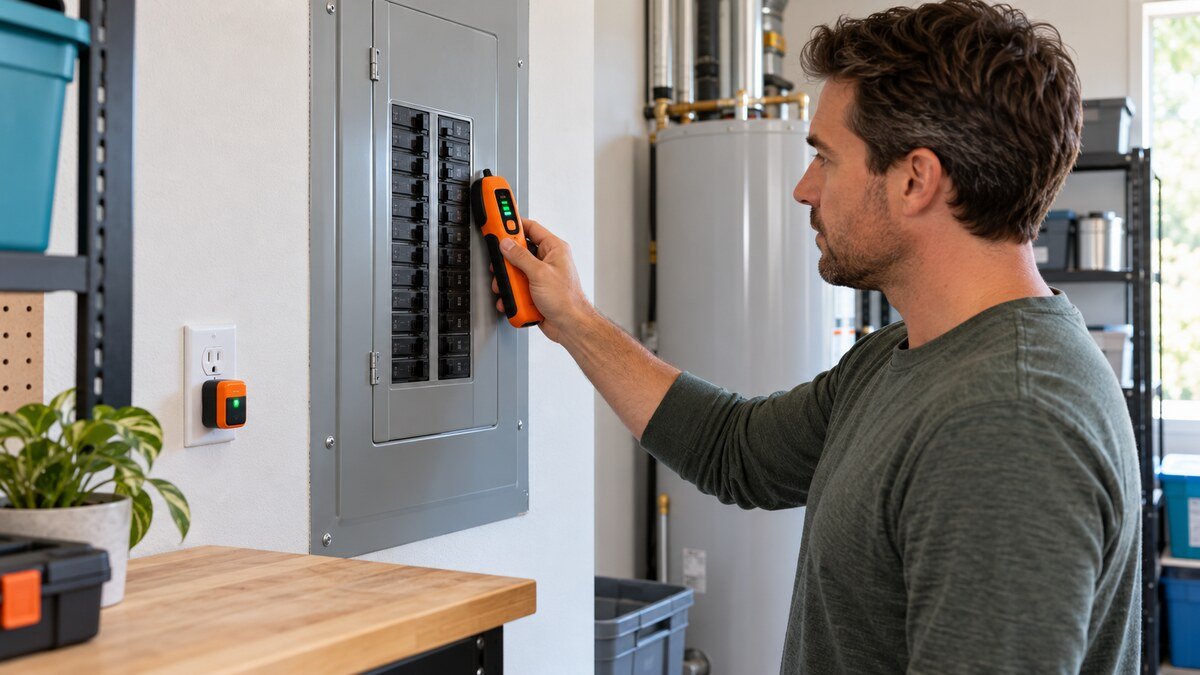
Begin at one end of the panel and pass the receiver over every breaker at the same speed and distance. Do not stop when it alerts. Then repeat the entire panel. The second pass should narrow the result. If the manual specifies a third confirmation scan, complete it.
5. The Receiver Is Moving Too Fast or at the Wrong Angle
The sensor must pass close enough to each breaker for long enough to compare signal strength. Racing down the panel, changing wrist angle, or moving in a zigzag produces inconsistent readings. Wide double-pole breakers also require a deliberate scan across their full face.
Hold the receiver in the orientation shown by the manufacturer. Move at a steady pace, keep the same gap from each breaker, and scan the center of each handle or specified detection point. If the panel has two columns, complete each column systematically instead of jumping between likely candidates.
6. Nearby Electronics Are Creating Noise
LED drivers, dimmers, phone chargers, computer power supplies, variable-speed motors, solar equipment, and some surge suppressors can add electrical noise. A breaker finder’s coded signal is designed to be distinguishable, but heavy interference can reduce contrast between the correct breaker and its neighbors.
Unplug nonessential electronic loads on the target circuit and nearby circuits if this can be done safely. Retest with the transmitter directly in the outlet. Do not shut down medical, security, refrigeration, network, or other essential equipment merely to improve a scan.
7. Signal Coupling Is Triggering Adjacent Breakers
Conductors run close together through the panel and cable routes. The transmitter’s signal can couple into neighboring wiring, so several breakers may alert on the first pass. This does not automatically mean the tool is broken.
Complete calibration, slow down, and repeat the scan. Compare the strength and consistency of each alert rather than choosing the first one. Switch off the strongest candidate, return to the receptacle, and confirm that the transmitter and outlet lose power. If two breakers appear related or the result is unexpected, stop and investigate with qualified help.
8. The Circuit Configuration Is Unusual
Subpanels, multi-wire branch circuits, shared neutrals, generator transfer equipment, tandem breakers, older wiring, and mislabeled panels can make tracing less straightforward. A transmitter located on a downstream subpanel circuit should normally be sought at that subpanel first, not automatically at the main service panel.
Confirm which panel likely supplies the area. Check whether the receptacle is on a switched circuit or part of a GFCI-protected chain. Do not remove a panel cover to improve detection. If the finder repeatedly indicates multiple poles or the circuit behaves unexpectedly, a licensed electrician can trace it with more capable equipment.
9. The Finder or Adapter Is Faulty or Incompatible
If the outlet is energized, the transmitter indicator is normal, the receiver has a fresh battery, and the exact scan procedure still produces no reliable result, test the kit on a different known circuit. A successful control test suggests the original circuit conditions are the problem; failure on multiple simple circuits points toward the tool.
Inspect for cracked housings, bent plug blades, contamination, corrosion, or signs of overheating. Use only compatible accessories. Check the voltage range, panel type, and application in the manual. Contact the manufacturer if the self-test fails or a new unit remains unreliable.
The Correct Step-by-Step Rescan Method
- Check the rating: Confirm the transmitter and receiver are intended for the circuit voltage and application.
- Verify outlet power: Confirm the receptacle is energized without touching exposed conductors.
- Connect directly: Plug the transmitter straight into the wall outlet and confirm its indicator.
- Prepare the receiver: Install a fresh battery, power it on, and select the correct mode.
- Scan every breaker: Move slowly and consistently across the entire suspected panel.
- Repeat the scan: Allow calibration to eliminate weaker neighboring signals.
- Switch off the candidate: Turn off only the identified branch breaker.
- Confirm at the outlet: Verify that the transmitter loses power and test the receptacle appropriately.
- Label only after confirmation: Record the room, device, and any important circuit notes clearly.
For a broader explanation of tool choice, see wire tracer vs circuit breaker finder. If you are selecting a replacement, compare our best circuit breaker finders. For a connected workflow, read how to check if a wire is live.
When You Should Stop Troubleshooting
Stop if the breaker, outlet, or transmitter becomes warm; if you smell burning; if you hear buzzing or crackling; if a breaker will not remain set; or if the outlet shows physical damage. Also stop when switching off the indicated breaker does not remove power as expected. These conditions deserve proper electrical diagnosis, not repeated scanning.
Do not remove the dead front from a service panel simply to move the receiver closer to wiring. The cover helps separate you from energized components. A basic breaker finder is designed to work from the breaker faces with the panel assembled.
Should You Replace the Tool?
Replacement makes sense when the receiver fails its self-test, battery contacts are damaged, the transmitter has loose or burned blades, or the kit fails on several simple known circuits despite correct setup. An upgrade can also be worthwhile if you frequently map panels and need clearer feedback, automatic calibration, GFCI testing, a light-socket adapter, or accessories approved for your use.
Do not buy solely on the longest claimed detection range. Repeatability, easy calibration, readable indicators, safe ratings, included adapters, documentation, and manufacturer support matter more during real panel mapping.
Frequently Asked Questions
Why does my breaker finder beep on every breaker?
The first pass may be calibration, or sensitivity may be high enough to detect coupled signals. Scan the entire panel at a consistent speed, then repeat. A good second pass should narrow the result.
Can a breaker finder work on a dead outlet?
A typical plug-in model needs an energized receptacle. Some specialized circuit tracers support de-energized conductors, but only when their instructions explicitly describe that mode.
Will a breaker finder work through a power strip?
It may, but filters, surge components, and additional wiring can weaken or distort the signal. Plug the transmitter directly into the wall for the most reliable first test.
Why does the receiver identify the breaker next to the correct one?
Signal coupling, inconsistent scan position, or incomplete calibration can make an adjacent breaker appear strongest. Repeat the full scan and verify the result by switching off the candidate and testing the outlet.
Can I use a breaker finder on a light fixture?
Only with an adapter and procedure approved for that specific finder. Do not improvise connections to exposed conductors.
Does a breaker finder replace a voltage tester?
No. It helps identify a breaker, but an appropriately rated voltage tester is still required to verify the circuit condition before electrical work.
Final Verdict
When a circuit breaker finder is not working, start with the simple causes: confirm outlet power, reseat the transmitter, replace the receiver battery, and follow the complete calibration sequence. Slow, consistent scanning and a second pass solve many false-reading problems. Then confirm the result at the original outlet instead of trusting the receiver alone.
If the kit fails a control test on multiple known circuits, replace it or contact the manufacturer. If the wiring behaves unpredictably, stop and call a licensed electrician. The purpose of a breaker finder is to reduce uncertainty—not to justify working through unexplained electrical conditions.
