
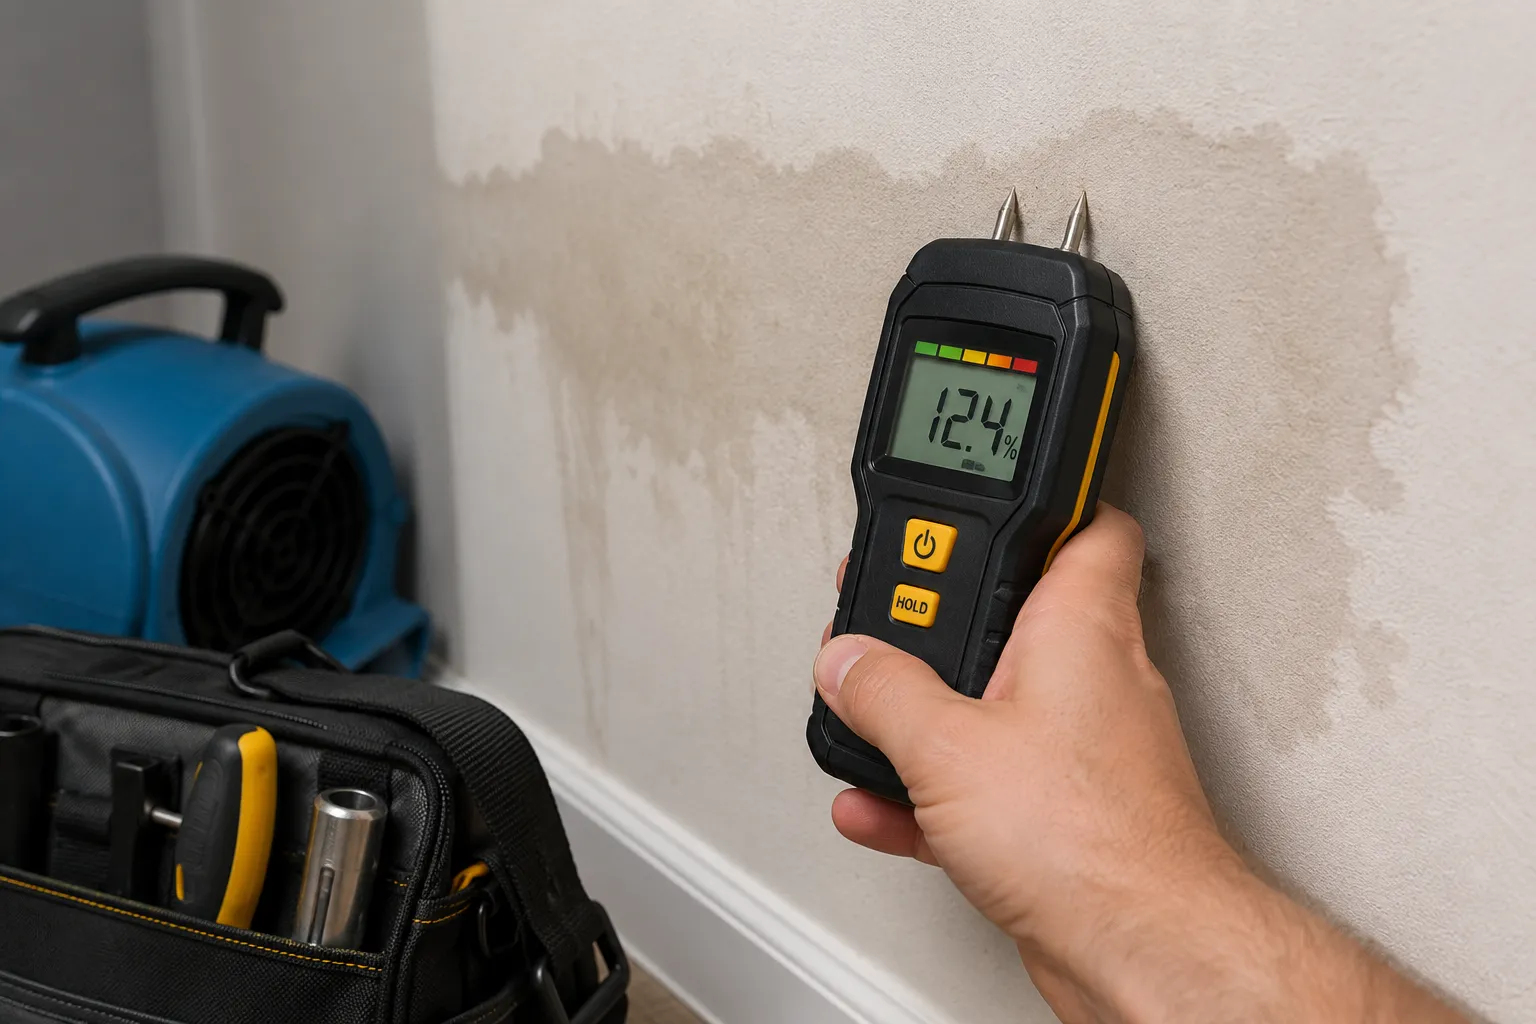
To use a moisture meter on drywall, first compare a dry area to the suspected wet area, then test the wall in a grid pattern and look for readings that rise above your baseline. A moisture meter helps you spot hidden dampness before you paint, patch, or close up a wall.
If you are wondering how to use a moisture meter on drywall, the short answer is: start with a dry reference spot, test the wall in a few places, and compare the readings. That simple process can help you catch leaks early and avoid repairs that fail later.
In this guide, we explain how to choose the right meter, how to test drywall step by step, and how to read the results without guessing. We also cover common mistakes and what to do if the wall shows signs of hidden moisture.
- Choose a meter made for building materials.
- Find a known dry area to set your baseline.
- Test the wall in a grid pattern.
- Check problem areas like windows and plumbing walls.
- Repeat readings to confirm wet spots.
- Mark the highest numbers on the wall.
- Trace the moisture source if readings stay high.
- Retest after drying to confirm the wall is back to normal.
Why You Should Use a Moisture Meter on Drywall Before Repairs or Painting
Drywall can look fine on the surface while holding moisture inside. That is why a moisture meter is useful before painting, patching, or replacing sections of wall.
According to the U.S. Environmental Protection Agency, drying wet materials quickly matters because moisture can lead to mold growth and damage. You can learn more from the EPA’s mold guidance for homes.
When drywall stays damp, the paper face can soften and the board can swell. That can lead to bubbling paint, peeling tape joints, stains, and a wavy wall surface.
Moisture also creates the right conditions for mold. Even if you do not see black spots yet, damp drywall can still support growth behind the paint or inside the wall cavity.
Many wall failures blamed on “bad paint” actually start with moisture that was never checked before the repair.
When a moisture meter is the right tool versus visual inspection alone
Visual inspection is helpful for stains, soft spots, and peeling paint. But it cannot tell you what is happening inside the wall. A moisture meter gives you a better picture when the leak is hidden or the damage is still early.
If you already see a stain, smell a musty odor, or notice bubbling paint near plumbing, a meter is a smart next step. If the wall is clearly dry and there are no signs of water damage, a quick visual check may be enough for routine maintenance.
Choosing the Right Moisture Meter for Drywall Testing
Not every moisture meter works the same way. For drywall, the best choice depends on whether you want quick surface checks or more direct readings from inside the material.
| Meter type | How it works | Best for drywall | Main tradeoff |
|---|---|---|---|
| Pin meter | Uses two pins that touch or enter the material | Good for direct readings and comparing problem spots | Leaves tiny holes in the wall |
| Pinless meter | Scans the surface with sensors | Good for fast, non-damaging surface checks | Can be affected by wall texture, depth, and nearby materials |
Pin meters vs. pinless meters for drywall
Pin meters are useful when you want a direct contact reading and do not mind making tiny pin holes. They can be a good fit for checking a damaged section before repair.
Pinless meters are better when you want to scan large areas quickly without marking the wall. They are often the easier option for homeowners checking painted drywall in living spaces.
Best meter features for homeowners: depth settings, display, and calibration
For drywall, look for a meter with a clear display, easy material settings, and a stable reading. Depth settings can help if the meter offers them, especially when wall thickness or layered finishes may affect the result.
Calibration matters too. Follow the user manual and check the meter on a known dry area before trusting the numbers. Some tools also have hold functions or color indicators that make readings easier to record.
When a stud finder or thermal camera can help alongside a moisture meter
A stud finder can help you avoid testing over studs, which can change readings. It also helps you map the wall and find the best test points.
A thermal camera can sometimes show cool areas linked to active leaks or damp insulation, but it does not replace a moisture meter. The meter confirms whether the wall material is actually wet.
What You Need Before You Test Drywall Moisture
Before you start, gather the basic tools and take a minute to think about safety. That makes the test faster and more reliable.
Moisture meter, batteries, and user manual
Make sure the meter has fresh batteries and that you know how to switch modes. The manual matters because different meters use different labels for drywall, wood, or building materials.
Pencil, painter’s tape, and notebook for marking readings
Use a pencil or painter’s tape to mark high readings on the wall. A notebook helps you track the date, location, and number so you can compare results later.
Safety gear for suspected water-damaged or moldy drywall
If the area smells moldy or looks damaged, wear gloves and a dust mask or respirator as needed. If you see major mold growth, damaged insulation, or a strong sewage smell, stop and get professional help.
Do not cut into drywall or remove baseboards until you understand the source of the moisture. Opening the wall too soon can spread contamination or make the damage worse.
How to Use a Moisture Meter on Drywall Step by Step
The process is simple once you know the order. The goal is not to chase one random number, but to map the wall and find patterns.
Choose the setting for drywall or building materials if your meter has one. This helps the tool interpret the wall more accurately.
Test a nearby wall section that you believe is dry. That gives you a baseline to compare with the suspected area.
Move across the wall in a simple grid, taking readings every few inches. This helps you see where moisture rises and where it stays normal.
Focus on baseboards, windows, ceilings, and plumbing walls. These are common places for hidden water entry.
Take a second or third reading in the same area. If the number stays high, it is more likely to be real moisture and not a one-off spike.
Use painter’s tape or a pencil mark to show the wettest spots. Write down the readings so you can compare them later.
Once the wall has dried, test the same spots again. The readings should move back toward your dry baseline.
Step 1 — Turn on the meter and confirm it is set for drywall or building materials
Before testing, check the display and make sure you are in the correct mode. Some meters have separate settings for wood, drywall, or masonry, and the wrong mode can throw off the result.
Step 2 — Compare readings against a known dry area first
This is one of the most important parts of the process. A single number does not mean much by itself. What matters is how it compares to a dry section of the same wall or a nearby room.
Step 3 — Test in a grid pattern across the suspected wall section
Move the meter across the wall in rows and columns. A grid pattern makes it easier to spot a damp cluster instead of missing a small wet area between test points.
Step 4 — Check around baseboards, windows, ceilings, and plumbing walls
Leaks often show up near edges, corners, and penetrations. Check around trim, window frames, ceiling lines, sink walls, and any wall with supply or drain lines inside it.
Step 5 — Take repeated readings to confirm wet spots
If one spot reads high, test it again and compare nearby points. A true moisture problem usually shows a pattern, not just one isolated number.
Step 6 — Mark and record the highest moisture readings
Write down the numbers, the location, and the date. This record helps you track whether the wall is drying or getting worse.
Step 7 — Recheck after drying to confirm the drywall has returned to normal
After drying, test the same areas again. If the numbers drop back near the dry baseline, the wall is likely recovering. If they stay high, the source may still be active.
How to Read Moisture Meter Results on Drywall Correctly
Reading the numbers correctly is just as important as taking the test. For reference ranges and interpretation, read what a normal moisture reading for drywall looks like. Most meters do not give a simple “wet” or “dry” answer in a way that works for every wall, so context matters.
| Reading type | What it usually suggests | What to do next |
|---|---|---|
| Dry | Close to your baseline dry area | Record it and compare with nearby spots |
| Elevated | Higher than the dry baseline, but not clearly soaked | Retest, map the area, and watch for a pattern |
| Wet | Clearly above normal for that wall | Trace the source and dry or open the wall if needed |
What “dry,” “elevated,” and “wet” readings usually mean
These labels are more useful as a guide than as a strict rule. A “dry” reading means the wall is close to your normal baseline. “Elevated” means the wall may hold more moisture than expected. “Wet” means the reading is high enough that you should investigate further.
Why drywall readings must be compared to a baseline, not guessed from one number
Different wall materials, paint layers, and meter types can all change the number you see. That is why comparing one spot to another is more reliable than guessing from a single reading.
Manufacturers such as The Home Depot’s moisture meter guide explain the same basic idea: use the tool to compare areas, not to rely on one random number.
How paint, wallpaper, and wall texture can affect readings
Thick paint, wallpaper, texture, and patch compounds can all influence a meter reading. Pinless meters can be especially sensitive to these surface layers, while pin meters may be affected by how well the pins contact the material.
If the wall has heavy texture or multiple coatings, take several readings in nearby spots and look for a clear pattern instead of a single exact value.
Common Mistakes When Using a Moisture Meter on Drywall
Most mistakes happen when people rush the test or read too much into one number. A careful method gives you much better results.
- Map the wall in several spots
- Use the correct meter setting
- Compare to a dry baseline
- Check edges, corners, and trim
- Rely on one reading only
- Use the wrong material mode
- Ignore hidden moisture near outlets or baseboards
- Assume condensation is the same as wall saturation
Testing only one spot instead of mapping the wall
A single spot can miss the real problem. Moisture often spreads in a patch, so a grid pattern gives you a much better picture of where the water is.
Using the wrong mode or material setting
If your meter has settings for different materials, use the one meant for drywall or building materials. The wrong setting can make a damp wall look normal or make a dry wall look suspicious.
Sometimes a cold wall sweats on the surface, especially in humid rooms. That is not always the same as water inside the drywall. Wipe the surface dry and test again if condensation is present.
Ignoring moisture behind trim, baseboards, and near outlets
Water often travels along the bottom of a wall or behind trim before it shows on the face of the drywall. Check those edges carefully, and be extra cautious around electrical outlets.
Pros and cons of pin vs. pinless testing on drywall
- Pin meters can confirm moisture more directly
- Pinless meters scan large areas fast
- Both help you compare wet and dry sections
- Pin meters leave tiny holes
- Pinless meters can be influenced by wall layers
- Both can be misread without a dry baseline
What to Do If Your Drywall Shows High Moisture Readings
If the meter shows high moisture, do not stop at the number. The next step is to find out where the water is coming from and whether the wall can dry safely.
How to trace the moisture source: roof leaks, plumbing leaks, or condensation
Start by thinking about what is above, behind, or near the wall. Roof leaks often show near ceilings, plumbing leaks near sinks or bathrooms, and condensation near cold exterior walls or poorly ventilated rooms.
When to remove drywall, dry the cavity, or call a professional
If the readings stay high, the drywall may need to come out so the cavity can dry. If the area is large, the damage is old, or you are unsure about electrical or mold issues, call a qualified contractor or water-damage professional.
When mold inspection or remediation may be necessary
If you see visible mold, smell a strong musty odor, or know the wall has been wet for a while, mold inspection may be worth considering. If mold is confirmed, remediation should be handled carefully so spores are not spread around the home.
How long to wait before retesting after drying
Wait long enough for the wall to dry fully, not just on the surface. The exact time depends on the amount of water, airflow, and the wall assembly. Retest only when the area feels dry and the readings are trending down toward your baseline.
The wall keeps reading wet after drying, the damage is spreading, or you suspect mold, hidden plumbing leaks, or electrical risk. In those cases, a professional inspection is the safer move.
Moisture Meter Testing Tips for Better Drywall Accuracy
A few small habits can make your readings much more trustworthy. These tips help you avoid false alarms and missed leaks.
- Test the same wall at the same height when comparing readings.
- Use painter’s tape to mark wet spots without damaging the finish.
- Take readings in more than one room if the leak path is unclear.
- Keep notes on weather, humidity, and recent plumbing or roof work.
- Retest after the room has been ventilated and dried for a realistic check.
If you are checking an exterior wall, compare the suspect area with an interior wall in the same room. That comparison often makes moisture patterns easier to spot.
The best way to use a moisture meter on drywall is to compare a dry baseline, map the wall in a grid, and look for repeated high readings in the same area. When the numbers stay elevated, treat it as a sign to find the source before you repair, paint, or close the wall back up.
FAQ
A reading is concerning when it is clearly higher than a known dry area nearby. The exact number depends on the meter, so compare spots instead of relying on one fixed threshold.
No, a moisture meter does not detect mold directly. It only shows moisture levels, which can help you find conditions where mold may grow.
Pinless meters are good for quick, non-damaging scans. Pin meters are useful when you want more direct contact readings. Either can work if you compare results carefully.
Moisture near the floor can come from leaks, seepage, or damp baseboards. It can also happen if the wall is affected by condensation or past water damage.
Retest after the wall has had enough time to dry and the readings should be trending down. If the wall is still wet after a reasonable drying period, the source may still be active.
Yes. Thick paint, wallpaper, texture, and patching compounds can change the result, especially on pinless meters. That is why a baseline comparison is so important.
- Use a dry baseline before trusting any drywall reading.
- Test in a grid so you can map moisture patterns.
- Check edges, trim, windows, ceilings, and plumbing walls.
- Repeat readings to confirm wet spots.
- High readings mean you should trace the source and dry the wall properly.
