
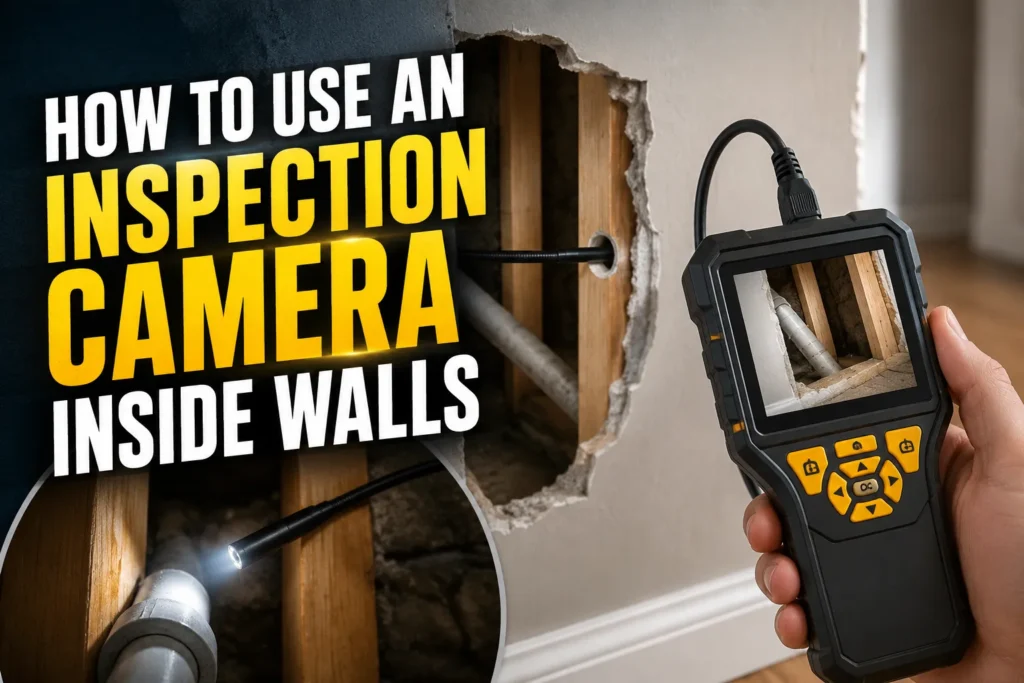
An inspection camera helps you look inside a wall cavity through a small opening so you can spot wires, pipes, insulation, pests, and signs of moisture. The key is to prepare the wall safely, move the camera slowly, and read the image carefully without assuming it can reveal every hidden problem.
If you want to know how to use an inspection camera inside walls, the process is simpler than it sounds. I use it as a small, careful window into a space I cannot see any other way.
In this guide, I’ll show you what the camera can really tell you, what tools help, and how to inspect a wall without making a bigger mess than needed.
- Choose the problem you want to inspect.
- Mark a safe entry point near an opening.
- Turn off power or water when needed.
- Drill the smallest practical hole or use an existing one.
- Feed the camera in slowly and adjust the light.
- Scan the cavity in short, careful moves.
- Watch for leaks, damage, pests, or moisture clues.
- Decide whether a repair pro needs to step in.
What an Inspection Camera Can and Cannot Show Inside Walls
Most inspection cameras are best at showing close-up conditions in a small area. They are useful for finding clues, but they do not replace a full repair inspection.
What a borescope can reveal: wires, pipes, insulation, pests, and moisture signs
A borescope or inspection camera can give you a clear look at the inside of a wall cavity. That often includes electrical cables, plumbing lines, insulation, wood framing, and open spaces.
You may also spot insect activity, rodent nests, droppings, chewed insulation, water staining, or damp surfaces. Those details can help you narrow down the problem before you cut a larger opening.
A camera only sees what is directly in front of the lens. If damage sits behind another board, wrap, pipe, or layer of insulation, the camera may miss it.
It also cannot tell you if a wire is live unless you use proper electrical testing equipment. And it cannot confirm whether a wall is structurally sound. For that, you need hands-on inspection by the right professional.
Choosing the right expectations before opening drywall
The best way to use this tool is to think of it as a guide, not a final answer. It can help you avoid guesswork, but it will not solve every hidden-wall problem on its own.
For official safety guidance on hidden hazards in buildings, I recommend checking the U.S. Consumer Product Safety Commission and OSHA resources, especially if you suspect wiring or other unsafe conditions: U.S. Consumer Product Safety Commission and OSHA safety guidance.
If you are unsure whether the wall contains electrical wiring, plumbing, or a load-bearing element, treat the opening as a safety task first and an inspection task second.
Tools and Materials Needed to Use an Inspection Camera Inside Walls
Inspection camera types: rigid, flexible, and wireless phone-connected models
Rigid cameras are good for short, straight inspections. Flexible cameras are easier to guide around slight bends and into tight spaces. Wireless phone-connected models are convenient if you want to view the image on a larger screen.
| Camera type | Best for | Main tradeoff |
|---|---|---|
| Rigid | Short, direct access holes | Less flexible in tight routes |
| Flexible | Moving around insulation or slight obstacles | Can be harder to aim precisely |
| Wireless phone-connected | Easy viewing and image sharing | Battery life and signal can vary |
Helpful add-ons: LED light control, mirror tip, magnetic tip, and locator accessories
Light control matters a lot. Too little light makes the cavity look dark and grainy. Too much light can wash out details and hide texture.
A mirror tip can help you look around corners. A magnetic tip may help retrieve small metal items. Locator accessories are handy if you want to know where the camera head is relative to the wall surface.
Safety gear and prep items: gloves, dust mask, drop cloth, stud finder, and tape
I always keep basic safety items nearby. Gloves help when you reach into a dusty opening. A dust mask can reduce irritation from insulation or drywall dust. A drop cloth keeps the area easier to clean.
A stud finder and painter’s tape help you mark a safe path before you drill. That small step can save you from hitting a stud, cable, or pipe.
Optional repair supplies for after the inspection: patch kit, paint, and spackle
Once the inspection is done, you may want to close the opening neatly. A simple patch kit, some spackle, and matching paint are enough for many small inspection holes.
If the wall needs a larger repair, it is better to patch it properly than to rush the finish.
How to Prepare the Wall Before Inserting the Inspection Camera
Identify the inspection goal: plumbing leak, electrical issue, pest entry, or insulation check
Start with one clear question. Are you looking for a leak, a wiring issue, pests, or missing insulation? The answer changes where you inspect and what you look for.
When your goal is clear, you are less likely to make extra holes or miss the right part of the cavity.
Mark a safe entry point near an access hole, outlet opening, or small drilled opening
If there is already an access opening, use it when possible. If not, choose a small spot that is easy to patch later and near the area you want to inspect.
Outlets, switch plates, and other existing openings may offer a safer path than drilling in a random spot.
Do not drill blindly into a wall if you suspect wiring or plumbing is behind it. A small mistake can turn a simple inspection into a costly repair.
Turn off power or water when the wall contains electrical wiring or plumbing
If the wall may contain active wiring, turn off the circuit at the breaker before you start. If you are inspecting a possible leak, shut off the water supply when appropriate.
This is not just a good habit. It lowers the chance of shock, water spray, or extra damage during the inspection.
Use a stud finder and plan the camera path to avoid cables, pipes, and blocking supports
A stud finder helps you map the wall before you open it. Mark the stud locations, then plan where the camera will go between them.
Most wall cavities are not empty from top to bottom. You may run into blocking, fire stops, insulation, or framing members, so plan for a slow, careful route.
Use painter’s tape to mark your drill point and the nearest stud edges. It keeps your layout visible and helps you stay centered while working.
How to Insert and Maneuver an Inspection Camera Inside Walls
Drill the smallest practical access hole or use an existing opening
The smaller the hole, the easier the patch. Use the smallest opening that still lets the camera move freely and gives you a usable view.
If an outlet opening or service hole already exists, that is often the cleanest starting point.
Feed the camera slowly to avoid snagging on insulation, nails, or debris
Move the camera in small increments. Wall cavities can hide rough drywall edges, loose insulation, screws, or nails that catch the tip.
Slow movement also helps you understand what you are seeing. If you push too fast, the image becomes hard to read and easier to misjudge.
Adjust the light and image angle for clearer visibility in dark cavities
Start with low or medium light, then increase it only if the image is too dark. The right level depends on how reflective the cavity is and how close the camera is to the surface.
If your camera has angle control, tilt it until the image shows the area you actually want to inspect, not just the nearest wall surface.
Pan, tilt, and reposition the tip to inspect studs, pipes, wires, and corners
Think of the camera like your eyes inside the wall. Pan slowly from side to side. Tilt up and down. Reposition a little, then look again.
This is how you inspect the whole cavity instead of only the first thing the lens points at.
Move in short increments to map the cavity instead of pushing too far at once
Short moves help you build a mental map of what is inside the wall. You can note where the stud is, where the wire runs, and where the pipe bends.
That pattern is more useful than a single long push that leaves you unsure of what you just saw.
If your camera image keeps going out of focus, pull back slightly and clean the lens if needed. Dust and close contact can make the picture look worse than the wall really is.
How to Read What You See on the Camera Screen Inside Walls
Spotting plumbing problems: drips, corrosion, condensation, and pipe movement
Look for water droplets, rust, white mineral buildup, dark staining, and damp surfaces around pipes. If a pipe is touching framing in a way that looks unstable, that is worth a closer look.
Even a small drip can leave a trail. Follow the stain upward and downward to find where the moisture may be starting.
Spotting electrical concerns: damaged insulation, loose connections, and overloaded boxes
Check for cracked wire insulation, char marks, loose cable bundles, or crowded junction boxes. These are signs you should not ignore.
Do not use the camera as proof that wiring is safe. It can show visible damage, but it cannot test the circuit.
Spotting moisture or mold clues: staining, discoloration, and damp material
Water damage often appears as darker patches, fuzzy discoloration, swollen wood, or insulation that looks clumped or wet. Mold may not always be obvious, but moisture clues often show up first.
If you see repeated dampness, the wall may need a deeper moisture check and a proper repair plan.
Spotting pests and debris: nests, droppings, chewed insulation, and entry gaps
Pests leave signs behind. Look for droppings, shredded material, nesting debris, chewed foam, or small gaps where they may enter.
If you see a nest or active movement, avoid disturbing the area more than needed until you know what kind of pest you are dealing with.
Using the image to decide whether you need a plumber, electrician, or contractor
A camera image can help you choose the next step. If you see water around a pipe, a plumber may be the right call. If you see damaged wiring, an electrician should handle it. If the issue looks like framing damage, rot, or a larger wall problem, a contractor may need to inspect it further.
You see exposed wiring, active moisture, suspected mold, damaged framing, or anything that looks unsafe to touch. A camera can guide you, but it should not replace professional judgment when the problem looks serious.
Common Mistakes When Using an Inspection Camera Inside Walls
- Move the camera slowly and watch the image carefully
- Use the lowest light level that still shows detail
- Mark studs and known hazards before drilling
- Stop if the camera snags or the image becomes unclear
- Force the tip through tight or rough openings
- Assume shadows or dust are always damage
- Drill near unknown wiring or plumbing
- Treat the camera as a full safety test
Pushing the camera too hard and damaging the wall cavity or the camera tip
It is easy to get impatient, but forcing the camera can bend the tip, snag insulation, or widen the opening more than needed. Gentle movement gives better results and protects your tool.
Using too much light and washing out the image
Bright light can bounce off pipes, foil-backed insulation, or shiny surfaces and hide the very detail you are trying to see. If the image looks flat or blown out, reduce the light and try again.
Misidentifying shadows, dust, or insulation as damage
Wall cavities are dusty and uneven. A dark shadow is not always a stain, and loose insulation is not always a sign of trouble. Take a second look before you decide something is broken.
Drilling in the wrong place and hitting wiring or plumbing
This is one of the biggest risks. A wrong drill point can damage hidden services fast. That is why layout, stud finding, and careful planning matter before you make any opening.
Sometimes a camera can only show part of the story. If you suspect rot, structural damage, or a leak that has spread behind several layers, the wall may need to be opened more fully for a real repair assessment.
- Take still photos or short clips so you can review the cavity later.
- Use painter’s tape to label where each image was taken from.
- Inspect in short passes: top, middle, then bottom of the cavity.
- Clean the camera lens before every use for a sharper image.
Using an inspection camera inside walls works best when you prepare carefully, move slowly, and focus on clues rather than perfect answers. It is a smart way to see inside a wall cavity, but the camera is only one part of the decision about repair or professional help.
FAQ
Yes. A small drilled hole is one of the most common ways to inspect inside a wall. Use the smallest practical opening that still lets the camera move and show a clear image.
Usually yes, if the wires are visible in the cavity. But it cannot tell you if they are live, safe, or properly installed. For that, you need proper electrical testing and, in some cases, a licensed electrician.
It can help you spot signs of a leak, such as dripping, staining, corrosion, or damp material. It may not show the exact source if the leak is hidden behind another layer or outside the camera’s view.
Flexible cameras are often the easiest for wall cavities because they can move around slight obstacles. A rigid model can also work well for straight, short inspections, especially if the access point is simple.
If there is any chance the wall contains electrical wiring near your access point, yes, turn off the circuit first. That is a basic safety step whenever you are working close to hidden electrical lines.
Not reliably. It may show visible damage, rot, or movement, but it cannot confirm structural strength. If you suspect structural problems, a qualified contractor or inspector should evaluate it.
- An inspection camera helps you see wires, pipes, pests, and moisture clues inside walls.
- It cannot reliably confirm live voltage, hidden damage behind layers, or structural safety.
- Start with a clear goal, mark a safe entry point, and turn off power or water when needed.
- Feed the camera slowly, adjust the light, and inspect in short increments.
- Use what you see to decide whether you need a plumber, electrician, or contractor.
- When the problem looks serious, get a professional involved instead of guessing.