
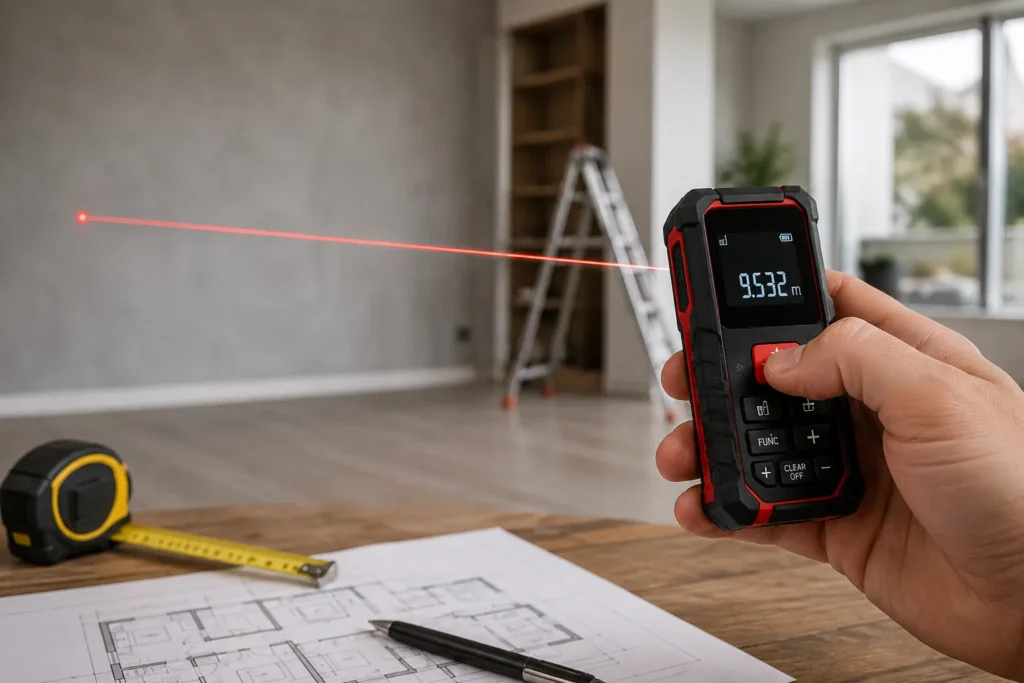
To use a laser measure, turn it on, choose the right unit and reference point, aim the laser at a flat target, and press measure to get the distance. For the best results, keep the tool steady, avoid shiny or glass surfaces, and double-check the reading before you write it down.
If you’ve ever tried to measure a room, a wall, or a hard-to-reach spot with a tape measure, you already know why laser measures are so handy. We’re AccurateGoods Editorial Team, and in this guide we’ll show you how to use a laser measure in a simple, practical way.
We’ll cover what the tool does, how to read the display, how to measure common DIY projects, and the mistakes that can throw off your numbers.
- Turn on the laser measure and set the correct units.
- Choose the right reference point for your measurement.
- Aim the laser at a flat, solid target surface.
- Press the measure button and read the result.
- Save, add, or subtract measurements if needed.
- Check accuracy on important jobs before you start cutting.
What a Laser Measure Does and When to Use One
A laser measure sends out a laser beam, bounces it off a target, and calculates the distance based on how long the return takes. That makes it fast for measuring rooms, walls, ceiling heights, and other spaces where a tape can be awkward.
How laser measures calculate distance
Most consumer laser measures use time-of-flight or phase-based measurement. In plain terms, the device sends out a beam, receives the reflection, and converts that return into a distance reading.
The result usually appears on-screen in inches, feet, fractions, decimal feet, or metric units, depending on the model.
Many laser measures can calculate area and volume too, which is useful when you’re planning flooring, paint, or HVAC-related home projects.
Best uses for measuring rooms, walls, and layouts
Laser measures are a great fit for room dimensions, wall spans, closet interiors, hallway lengths, and ceiling heights. They’re also helpful when you need to measure across furniture, around obstacles, or from one side of a room to another.
If you’re laying out shelves, planning trim, or checking whether a new appliance will fit, a laser measure can save time and reduce guesswork.
When a tape measure may still be better
A tape measure still wins for very short measurements, soft materials, and situations where you need to wrap around an object. It can also be easier for marking exact points on trim, wood, fabric, or other surfaces that need a physical reference.
For many home projects, the best approach is to use both tools together.
Parts of a Laser Measure You Need to Know Before Measuring
Before you start, it helps to know the main controls and indicators. Different brands look a little different, but the layout is usually similar.
The power button turns the tool on and off. The measure button is the one you press to take a reading. The mode button often changes between distance, area, volume, continuous measurement, and indirect measurement.
Some models combine buttons, so check the manual if your device has fewer controls than expected.
Display icons, reference points, and unit settings
The display may show battery level, laser status, unit settings, memory slots, and mode icons. A key setting to understand is the reference point, which tells the device where the measurement starts from.
Common reference points are the front edge, the back edge, and sometimes a tripod mount point.
If your reading seems off by the thickness of the tool itself, the reference point is often the reason. Check whether the device is measuring from the front or back edge before you assume it’s inaccurate.
Battery compartment and laser emitter/receiver
The battery compartment is usually on the back or underside of the tool. Keep fresh batteries in the device if you use it often, because low power can make readings less reliable.
The laser emitter sends the beam out, and the receiver picks up the reflected signal. Keep both areas clean and free of dust.
How to Use a Laser Measure Step by Step
Here’s the basic process we recommend for most home projects. Once you do it a few times, it becomes quick and easy.
Press the power button, then choose inches, feet, decimal feet, or metric units. Match the units to your project so you do not have to convert later.
Set the starting point before you measure. For most indoor work, the back reference is common, but the front edge can be useful in tight spaces.
Point the laser at a wall, board, door, or other solid target. A flat surface gives the receiver a clearer reflection and a more dependable reading.
Press the measure button once the laser dot is on target. The number should appear on the screen almost right away.
If your model supports memory or math functions, store the reading or combine measurements for area and volume. This is useful when you are planning a room or comparing multiple spaces.
If you want a manufacturer example of common features and settings, the Bosch laser measure product pages are a useful reference. You can compare display icons, range claims, and measurement modes across different models.
Step 1 — Turn on the device and select the correct units
Start by switching the tool on. Then pick the unit that matches your plan. If you’re buying flooring in the U.S., feet and inches may feel natural. If you’re doing layout work or comparing product specs, decimal feet or metric may be easier.
Step 2 — Choose your reference point: front, back, or tripod
This step matters more than many people expect. If the tool is set to measure from the back, the reading begins at the end resting against the wall or surface. If it’s set to the front, it starts from the front edge of the device.
That small difference can change the result enough to matter on trim, cabinetry, and built-ins.
Step 3 — Aim at a flat target surface
Hold the laser dot on a flat, stable surface. A painted wall, door, plywood sheet, or framing member usually works well. Try to avoid aiming at corners, edges, or uneven textures unless your model has a strong signal and the target is close.
Step 4 — Press measure and read the result
Once the dot is steady on the target, press the measure button. Read the number carefully and note the unit shown on the screen. If the display includes fractions or decimals, make sure you understand which format your model uses.
Step 5 — Save, add, or subtract measurements if needed
Some laser measures let you store readings, add lengths together, or subtract one measurement from another. That can help when you are figuring out total wall length, room perimeter, or material needs.
How to Get Accurate Laser Measure Results Every Time
Laser measures are easy to use, but a few habits make a big difference in accuracy.
Hold the tool steady or use a tripod
Small movements can change the laser point enough to alter the reading. If you’re measuring long distances or checking repeated measurements, brace your hands or use a tripod if the tool supports one.
Measure against solid, non-reflective surfaces
Flat drywall, wood, and matte-painted surfaces usually give better results than glossy or curved targets. The stronger and cleaner the return signal, the more reliable the reading tends to be.
Avoid bright sunlight, glass, and shiny finishes
Bright sunlight can make the laser dot harder to see, especially outdoors. Glass, mirrors, polished tile, and shiny metal can reflect the beam in the wrong direction or weaken the return signal.
For outdoor or long-range use, it helps to check the manufacturer’s guidance and the conditions the tool is rated for. The National Institute of Standards and Technology is a good source for understanding measurement standards and why consistent methods matter.
Check calibration and battery level before important jobs
If a reading seems unusual, test the tool against a known distance. Also check the battery icon before you start a project that depends on exact numbers. A weak battery can cause problems on some devices.
Do not rely on one reading for a cut that cannot be changed. Take the measurement twice, especially if the distance affects flooring, cabinets, or built-ins.
How to Measure Common DIY Projects with a Laser Measure
A laser measure becomes especially useful when you apply it to real projects around the house. Here are some common examples.
Measuring a room for flooring or paint
Measure the length and width of the room, then multiply those numbers to get area if your tool does not do it for you. For paint, you can also measure wall height and total wall lengths to estimate coverage more accurately.
Measuring wall length for shelving or trim
For shelves, picture rails, or baseboards, measure the full wall span from corner to corner. If the wall has a bump-out, alcove, or doorway, measure each section separately so your material list is more accurate.
When measuring a long wall, take one reading from each end if possible. If both numbers match closely, you can trust the result more.
Measuring ceiling height and diagonal distances
Ceiling height is simple with a laser measure if you can aim straight up at a flat ceiling point. For diagonal distances, some tools offer indirect measurement modes that help when a direct line is blocked.
Measuring for furniture, appliances, and window treatments
Use the laser measure to check clearances before you buy. Measure the width, height, and depth of the space, then compare it with the item’s dimensions. This is especially useful for refrigerators, washers, bookcases, curtains, and blinds.
| Project | What to Measure | Helpful Mode |
|---|---|---|
| Flooring | Room length and width | Area |
| Trim | Wall spans and sections | Distance |
| Ceiling height | Floor to ceiling | Distance |
| Furniture fit | Space width, height, depth | Distance or memory |
Laser Measure Features That Make Measuring Easier
Not every model has the same extras, but a few features can make a big difference in everyday use.
Area and volume calculations
These features are useful when you need to estimate flooring, paint, or room size. Instead of doing the math yourself, the tool can combine length, width, and height readings.
Continuous measurement mode
Continuous mode lets the tool update the reading as you move. That can help when you’re finding the shortest or longest distance in a space, or when you need a quick check while adjusting your position.
Pythagorean indirect measurement
This mode helps measure a distance indirectly using two or three points. It’s handy when a wall, ceiling, or corner blocks a direct line of sight.
Memory storage and backlit displays
Memory storage makes it easier to compare readings, and a backlit display helps in dim rooms, basements, and closets. Those small features can save time when you’re working alone.
- Reading is stable on a flat target
- Units match the project plan
- Reference point is confirmed
- Battery is strong
- Reading jumps around
- Laser dot lands on glass or shine
- Units are not what you expected
- Display is dim or battery is low
Pros and Cons of Using a Laser Measure
Like any tool, a laser measure has strengths and limits. Knowing both helps you decide when to use it and when to pair it with a tape measure.
Advantages over a tape measure
Laser measures are fast, easy to use alone, and great for long distances. They reduce the need to stretch a tape across a room or hold one end in place while you walk to the other side.
They’re also useful in tight spaces, around furniture, and when you need to measure repeatedly.
Common limitations and measurement pitfalls
Laser measures can struggle on reflective surfaces, in bright light, and on uneven targets. They also depend on line of sight, so they are less useful when something blocks the path.
Best situations for combining both tools
Use a laser measure for the main dimensions, then use a tape measure for short finish work, inside corners, and exact marking. That combination gives you speed and hands-on precision.
- Measure twice on important jobs
- Confirm the reference point before each room
- Use a matte target when possible
- Keep a tape measure nearby for final checks
- Assume every reading uses the same start point
- Trust a shiny or transparent target
- Ignore weak batteries or low-light display issues
- Use one result for a critical cut without checking
Common Mistakes to Avoid When Using a Laser Measure
Most bad readings come from setup mistakes, not from the tool itself. These are the issues we see most often.
Measuring from the wrong reference point
If the device is set to measure from the front but you think it starts at the back, every reading will be offset. Always confirm the reference icon before you begin.
Aiming at angled or uneven surfaces
An angled surface can send the beam away from the receiver. If the target is rough or uneven, move to a flatter section or take the reading from a different angle.
Ignoring target reflectivity and range limits
Glass, mirrors, and glossy finishes can create weak or false readings. Also, every laser measure has a maximum range, and accuracy often drops as you get close to that limit.
Misreading units, decimals, or stored values
It’s easy to confuse inches with feet, or decimals with fractions. If you save a value in memory, make sure you know which number is current before you use it in a cut list or layout plan.
- Take one practice reading on a known distance before a big project.
- Use painter’s tape on glossy targets to create a better reflection point.
- Keep the device clean so dust does not interfere with the emitter or receiver.
- Write down critical measurements right away instead of trusting memory.
You need a measurement for structural work, code-sensitive changes, or a project where even a small error could create a safety issue. For those jobs, it’s smart to confirm your numbers with a second method or a qualified pro.
Using a laser measure is simple once you understand the reference point, the target surface, and the display settings. For most home projects, it’s a fast and reliable way to measure rooms, walls, and layouts, especially when you pair it with a tape measure for final checks.
FAQs About How to Use a Laser Measure
Yes, but outdoor use can be harder because sunlight makes the laser dot less visible and can affect readings on some models. Check the tool’s range and outdoor rating before relying on it outside.
That depends on the model. Many home-use units work well for indoor rooms and hallways, while higher-end models can reach much farther. Accuracy usually drops as you approach the maximum range.
Yes, sometimes. If you can’t get a direct line of sight, use a corner-friendly setup, a tripod, or an indirect measurement mode if your tool has one.
For many DIY jobs, yes. It is usually accurate enough for room sizing, flooring estimates, shelving, and furniture fit checks. For critical cuts or structural work, it’s smart to verify the reading another way.
Check the reference point, target surface, battery level, and units first. Then take the measurement again from a steadier position or a different spot on the target.
- Set the units before you measure.
- Confirm the reference point every time.
- Aim at a flat, solid target for the best reading.
- Avoid glass, shine, and bright sunlight when possible.
- Use a tape measure for final checks on critical jobs.