
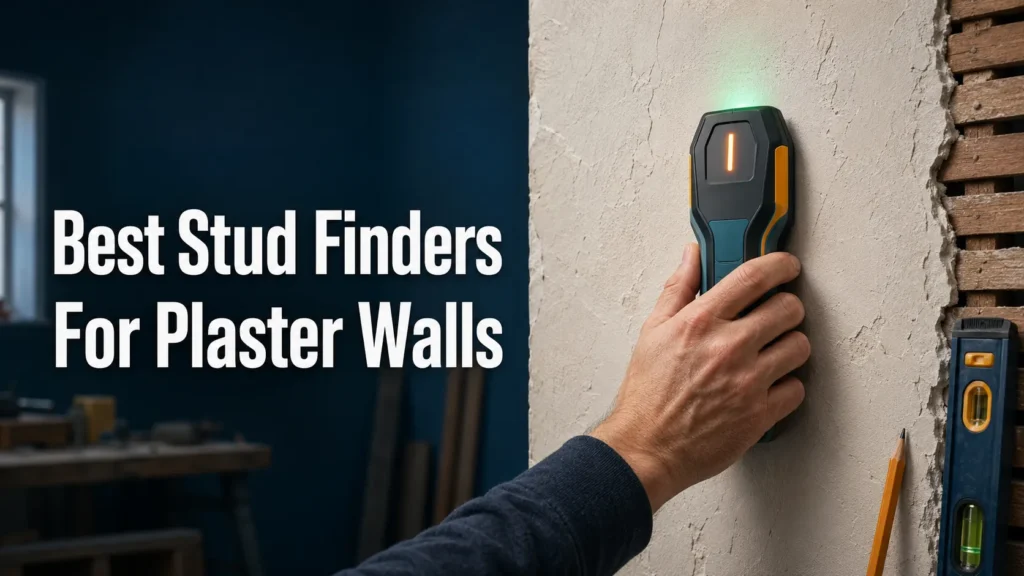
The best stud finders for plaster walls are usually deep-scan electronic models with good calibration, edge detection, and live-wire warning features. If your wall is old plaster over lath, a strong magnetic finder can also help you locate nails, but it works best as a backup tool rather than your only option.
If you’ve ever tried hanging a shelf or TV on an older wall, you know plaster can make the job tricky. The wall may look solid, but the material behind it can confuse basic stud finders.
In this guide, we explain what works best on plaster walls, what to avoid, and how to get reliable readings without damaging the surface. We also compare the main stud finder types so you can choose the right one for your home.
Best options at a glance:
- Deep-scan electronic finders for thicker walls
- Multi-sensor models for better accuracy
- Magnetic finders for nail-based stud locating
- Combo tools with wire detection
- Budget electronic models for light DIY use
- Premium scanners for old, dense plaster
Why Plaster Walls Need a Different Stud Finder Approach
Plaster walls are not the same as modern drywall. Many older homes use plaster over wood lath, and that layered build can affect how a stud finder reads the wall.
How plaster and lath affect signal accuracy
Plaster is thicker and less uniform than drywall. If the wall has wood lath behind it, the tool may detect the thin strips of wood instead of the actual stud. That can lead to false beeps or weak signals that seem unclear.
Some plaster walls also have uneven thickness from past repairs. A finder that works fine on drywall may struggle when the surface depth changes from one spot to the next.
Many old plaster walls contain both wood lath and metal nails, which can confuse simple stud finders and magnetic tools.
Why magnetic-only finders can miss studs in old walls
Magnetic stud finders look for nail heads or screws inside the wall. That can work well if the wall has enough fasteners in the right places. But if the nails are buried deep, rusted, or spaced oddly, the magnet may not pick them up easily.
They also do not tell you the stud’s full width or exact center. On plaster, that can make hanging heavier items more uncertain.
Common mistakes homeowners make on plaster surfaces
One common mistake is moving the tool too fast. Another is trusting a single reading without checking from both directions. Some people also skip calibration, which is a big reason for wrong results.
It also helps to remember that old walls may hide pipes, old wiring, or patch jobs. A good stud finder is useful, but careful scanning matters just as much.
What Makes the Best Stud Finder for Plaster Walls?
For plaster, the best tool is the one that can read deeper, stay stable during scanning, and give clear feedback. A simple finder may work for light picture hanging, but thicker walls need more capable tools.
Deep-scan capability for thicker wall assemblies
Look for a finder that offers deep-scan mode. This helps the sensor read through thicker plaster layers and reach the stud behind them. If your home has old lath and multiple repairs, this feature becomes even more useful.
Multi-sensor vs. magnetic stud finders for plaster
Multi-sensor electronic finders usually perform better than magnetic-only models on plaster walls. They can detect changes in density and often show stud edges more clearly. Magnetic finders are simpler and cheaper, but they depend on hidden metal fasteners.
For many homeowners, the best setup is an electronic finder for the main scan and a magnet for confirmation.
Live-wire detection and safety features
Older homes can have unpredictable wiring paths. A stud finder with live-wire detection adds a useful safety layer when you are drilling or mounting anything into a wall. It is not a substitute for caution, but it can help reduce risk.
If you want to learn more about safe wall work and hidden utilities, the U.S. Occupational Safety and Health Administration has helpful safety guidance for home and jobsite hazards.
Edge finding, center finding, and calibration reliability
Good edge detection helps you find both sides of the stud, which makes it easier to mark the center. On plaster, calibration matters a lot because the wall surface may not be perfectly even.
The best finders recalibrate smoothly and do not drift after a few passes. If a tool keeps giving different results in the same spot, it is probably not a great match for plaster.
Display clarity, sound alerts, and ergonomic grip
Clear displays are helpful when the wall is dark or when you are working in a tight area. Sound alerts can also make it easier to notice a signal while you focus on moving the tool slowly.
A comfortable grip matters more than many people expect. If the finder is awkward to hold, you are more likely to wobble, and wobble can reduce accuracy.
Best Stud Finders for Plaster Walls: Top Types and How They Compare
There is no single perfect stud finder for every plaster wall. The best choice depends on wall thickness, your budget, and how often you plan to use it.
| Stud Finder Type | Best For | Plaster Wall Performance | Typical Cost |
|---|---|---|---|
| Electronic deep-scan | Most homeowners | Strong | Moderate |
| Multi-sensor | Old or uneven walls | Very strong | Moderate to high |
| Magnetic | Simple nail locating | Fair | Low |
| Combo detector | Extra safety and flexibility | Strong | Moderate to high |
Best overall electronic stud finders for plaster
For most plaster walls, a well-rated electronic finder is the safest starting point. These tools can detect stud edges, often give a center mark, and usually work better than magnetic tools on thick surfaces.
Look for models from established tool brands that offer deep-scan and live-wire modes. Manufacturer guides from companies like STANLEY Tools are also useful if you want to understand how the tool is meant to be calibrated and used.
Best deep-scan stud finders for thick plaster walls
Deep-scan models are the best fit when plaster is thick or uneven. They are useful in homes with multiple wall layers, old repairs, or lath that makes standard tools less dependable.
These models are often the better choice if you plan to mount shelves, mirrors, or TVs. They give you a better chance of finding the stud behind the surface, not just the material in front of it.
Best magnetic stud finders for low-cost plaster projects
Magnetic finders are simple, cheap, and battery-free. They can be a smart low-cost option if you only need to hang something light and the wall has clear nail patterns.
They work best when you move slowly and confirm several fastener points in a row. If you only get one weak pull, do not assume you found a stud.
Best combo models with stud, metal, and wire detection
Combo models are appealing because they do more than one job. They can help you find studs, detect metal, and warn about live wiring in the same tool.
That extra flexibility is useful on old plaster walls, where hidden surprises are more common. The tradeoff is that some combo tools are a bit more complex to use, so they may take longer to learn.
Best budget option: a basic magnetic finder or entry-level electronic model if your wall is thin and your task is simple.
Best premium option: a multi-sensor deep-scan tool with wire detection, clear display feedback, and reliable calibration for thick or uneven plaster.
If you want a broader sense of wall construction and material behavior, the U.S. Department of Energy’s Energy Saver resources can help you understand older home building materials and upgrades.
Pros and Cons of Each Stud Finder Type on Plaster Walls
Each stud finder type has strengths. The trick is matching the tool to the wall, not just buying the most expensive one.
Electronic stud finders: strengths and limitations
Electronic stud finders are usually the best all-around choice for plaster. They can detect changes in density and give more useful information than a simple magnet.
The downside is that they need proper calibration. On rough or very thick plaster, they may still give mixed signals if you rush the scan.
Magnetic stud finders: when they work well and when they fail
Magnetic finders work well when nails or screws are close enough to the surface. They are small, durable, and easy to store.
They fail when fasteners are buried too deep, the wall has metal lath, or the stud layout is irregular. They also do not help much with center finding.
Deep-scan models: pros, tradeoffs, and false-positive risks
Deep-scan models are useful because they can reach through thicker wall layers. That makes them a strong match for older plaster homes.
The tradeoff is that deeper sensing can sometimes pick up nearby objects you did not mean to find. That includes old nails, pipes, or other dense spots. Careful re-scanning helps reduce mistakes.
Multi-function models: convenience vs. complexity
Multi-function tools save time because they combine several detection modes in one device. They are useful if you work on older homes often.
But the extra features can make the tool harder to read at first. If you prefer simple use, a straightforward electronic finder may be easier.
- Consistent readings from both scan directions
- Clear edge and center indicators
- Stable calibration on rough plaster
- Useful warning for hidden wiring
- Random beeps in the same area
- Signals that shift every pass
- No clear difference between edge and center
- Frequent false hits from lath or nails
How to Use a Stud Finder on Plaster Walls Correctly
Even the best tool can give bad results if it is used too fast. A slow, careful process makes a big difference on plaster.
Check whether you are dealing with plaster over lath, solid plaster, or another wall finish. If the home is older, assume the wall may be thicker and less predictable than drywall.
Place the finder on a spot with no obvious fasteners, outlets, or repairs. Follow the tool’s reset or calibration steps before you begin scanning.
Move the finder at a steady pace. Do not trust one pass alone. Scan the same area more than once and look for repeated signals in the same location.
Mark the left and right edges if the tool gives them, then estimate the center between those marks. A stud usually gives a wider, more consistent reading than a nail or patch.
If the result matters for a heavy mount, verify with a tiny pilot hole or finishing nail in a low-risk spot. This can help confirm the stud before you drill larger holes.
Tips for Getting Accurate Readings in Old Plaster Walls
Old plaster often needs a little extra patience. The good news is that a few simple habits can improve accuracy a lot.
Scan near outlets and switches to identify stud patterns
Outlets and switches are often mounted to the side of a stud. That can give you a clue about the stud layout in the room. Just be careful around electrical areas and avoid drilling near wiring unless you are sure of the path.
Avoid metal lath, pipes, and wiring interference
Some older walls contain metal lath, which can confuse both magnetic and electronic tools. Pipes and wiring can also create false readings. If the wall behaves strangely in one spot, move a little farther away and test again.
Use painter’s tape to mark findings without damaging the wall
Painter’s tape is a simple way to keep track of marks without writing directly on the plaster. It is helpful when you are comparing several scan passes and do not want to leave permanent marks behind.
Test in multiple directions for better confirmation
Scan vertically and horizontally if the tool allows it. A stud should usually appear in a similar location no matter which direction you approach it from. If the reading changes a lot, keep testing before you drill.
When to use a small finishing nail for verification
A tiny finishing nail can be useful when you need a final check and the wall finish can tolerate it. Use this only in a low-visibility spot and only after you have already narrowed down the location with the finder.
If you are hanging something heavy, trust repeated readings more than one strong signal. Consistency is usually a better sign than a single loud beep.
Common Problems When Finding Studs in Plaster Walls
Plaster walls can create confusing results, even with a good tool. Knowing the common problems makes it easier to spot them early.
False positives from lath, nails, or old patching
Old nails, repair patches, and wood lath can all look like studs to a finder. If the signal is narrow and disappears quickly, it may be one of these smaller features instead of a full stud.
Weak readings from thick or uneven plaster
Thick plaster can weaken the signal, especially if the wall has been repaired over time. In that case, a deep-scan tool usually performs better than a basic one.
Inconsistent results around corners, windows, and doors
Stud spacing often changes near openings. Corners, windows, and doors can have extra framing or unusual layouts, which makes readings less predictable. Be extra careful in these areas.
How to tell a stud from a wall anchor or pipe
A stud usually gives a longer, more continuous reading than a single anchor or pipe. If the signal seems like a thin point instead of a wider vertical zone, it may not be a stud at all.
Do not drill based on one uncertain reading, especially near outlets, plumbing, or old repairs. A small mistake can damage wiring, pipes, or the wall finish.
How Much Should You Spend on a Stud Finder for Plaster Walls?
For occasional picture hanging, a budget tool may be enough. For heavier shelves, mirrors, or TV mounts on old plaster, spending a bit more on a deep-scan or multi-sensor model usually makes sense.
The right price is the one that matches how often you will use the tool and how much risk is involved in the job.
- Always calibrate on an empty section before scanning.
- Use two or three passes before marking a stud.
- Choose deep-scan mode for thicker plaster walls.
- Keep a magnet handy to confirm nail patterns.
- Start with a light load if you are unsure of the result.
You are mounting something heavy, the wall gives inconsistent readings, or you suspect hidden wiring or plumbing. In those cases, it is worth taking extra time to verify the location before drilling.
The best stud finder for plaster walls is usually a deep-scan electronic model with reliable calibration and wire detection. Magnetic finders can still help, but on old plaster they work best as a backup for confirmation rather than your main tool.
FAQ
A deep-scan electronic stud finder is usually the best choice. It handles thicker wall layers better than basic models and gives more useful feedback on edges and centers.
Yes, but only if they can detect nails or screws close enough to the surface. They are useful for confirmation, but they are not always reliable as the only method.
Plaster, lath, old nails, and patching can all confuse the sensor. Calibration problems and scanning too fast are also common reasons for false readings.
Yes, but results are often better with a deeper-scan or multi-sensor model. Lath can cause extra signals, so slow scanning and repeated passes matter more than usual.
A real stud usually shows a wider, repeated signal in the same vertical line. If the reading is stable from multiple directions, it is more likely to be correct.
Only if you need final confirmation and the spot is low risk. A tiny pilot hole can help, but avoid it near wiring, plumbing, or areas where the wall finish must stay perfect.
- Plaster walls need deeper, more careful scanning than drywall.
- Deep-scan electronic finders are the best all-around choice.
- Magnetic finders work best as a backup, not the main tool.
- Calibration, slow passes, and repeat readings improve accuracy.
- Old plaster can hide lath, nails, wiring, and pipes.
- Verify important results before drilling into the wall.
